I am super excited! Amber, from A Little Bit Biased had a contest to name her new pattern.
I named the pattern "Square Dance" along with 2 other people. Amber is sending us each a copy of her new pattern! I can't wait to make it. It is a great excuse to buy some charm packs! Now to decide which charm pack to buy? I will be back soon to share more blocks and a fun challenge I put together for our local modern quilt guild.
Thursday, April 26, 2012
Sunday, April 22, 2012
April Block + a few others
I also finished 2 more of my farmer's wife blocks. I just need to trim them a bit. I was a little scared of trying to put together the "Birds in Air" block but I decided just to go for it. I highly recommend this book for practice and for stretching your skills.
My daughter even completed her second one. They look so cute together. I think her scrappy different colored approach is going to look so much better than mine.
Wednesday, April 11, 2012
Farmer's Wife Progress
I have made a little progress on the Farmer's Wife Quilt blocks. I have two more cut and partially pieced but I need to put it aside and get my April block done for the Half Square Triangle Quilt along. Finding time these days is getting harder. My sweet little boy is one that wants to be held all day. I am soaking it up since I am sure he is my last baby.
The best thing is that I have a little partner for the quilt along. My daughter has decided she wants to make a twin sized Farmer's Wife quilt. I have tried to convince her to do a doll quilt or a lap size but she is sure she wants to do one that fits her bed (she is about 7). So over the next year we will be partners in crime. She selects all of the colors, irons the fabric, and then sews them together. I iron the seems open for her. I am excited for her! It is fun to see her working on these. She is hand-stitching some and machine sewing others. She is definitely better at hand-stitching right now (I just draw on the seam for her and she sews across it) but this will be great practice for her and really allow her to learn a ton!
Friday, March 30, 2012
Slowly Getting Back to Life
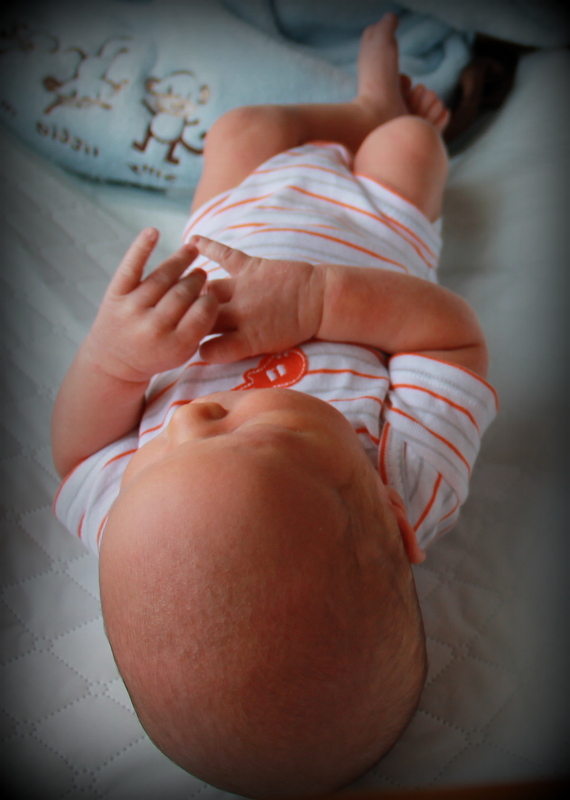
Almost 2 weeks ago I had this little guy:
After the hospital life seems like it is chaotic and in fast forward. Slowly though I have been working on getting back into crafting. My mom found this wonderful book at JoAnn's while she was here. I had mentioned that I wanted to make a simple one and asked for her help finding the correct yarn to use. I am so glad she found this book! How fun! I need more yarn - I want to try so many of the patterns in here.
Here is one I made (it is missing the final border - I had to tear it out because I just didn't reach). It is easy enough to do hand work while I am breastfeeding and holding the baby.
I also started hand-sewing one of the Farmer's Wife blocks. I will share a picture of that when it is finished. I am hoping to get back to doing even more soon. However, I am not rushing it too much. I am totally enjoying the quiet snuggling and feeding I spend most of my days doing currently.
After the hospital life seems like it is chaotic and in fast forward. Slowly though I have been working on getting back into crafting. My mom found this wonderful book at JoAnn's while she was here. I had mentioned that I wanted to make a simple one and asked for her help finding the correct yarn to use. I am so glad she found this book! How fun! I need more yarn - I want to try so many of the patterns in here.
Here is one I made (it is missing the final border - I had to tear it out because I just didn't reach). It is easy enough to do hand work while I am breastfeeding and holding the baby.
I also started hand-sewing one of the Farmer's Wife blocks. I will share a picture of that when it is finished. I am hoping to get back to doing even more soon. However, I am not rushing it too much. I am totally enjoying the quiet snuggling and feeding I spend most of my days doing currently.
Monday, March 12, 2012
Interlocking Square Dance tutorial
It is a fairly versitile pattern that is fun to arrange in many different ways.
The tutorial is going to show a two color variation but it is easy to add as many colors as you like once you have the basic block construction down. I could only get as close as a little over a 12 1/2 inch block...so it isn't exactly a 12 1/2 inch block. If that is what I might suggest taking an 1/8 of an inch off of the initial block and adjusting your measurements from there. If I try it again I will let you know the new increments.
Cut List
White:
(4) 2 1/4" Squares (Center Square)
(8) 1 1/2" Squares
(8) 1 1/2" x 3 3/8"
(8) 1 1/2" x 4 3/8"
Dark Blue:
(4) 1 1/2" x 3 3/8"
(4) 1 1/2" x 4 3/8"
(8) 1 1/2" Squares
Gray:
(4) 1 1/2" x 2 1/4"
(4) 1 1/2" x 3 3/8"
(8) 1 1/2" Squares
Directions:
1. Take your 2 1/4" White Center square and pair it with your gray 2 1/4" x 1 1/2" Gray. With right sides together sew (I use a 1/4 inch seam throughout) and then press your seams open.
2. Take your 1 1/2" x 3 3/8" rectangle and add it to the left hand side so that it creates a letter "L" when placed on top. Stitch and press seams open.
I tend to do all of mine in one go so that I don't have to go back and repeat the directions from the beginning.
3. Now add your 1 1/2" x 3 3/8" Blue rectangle to the opposite side right sides facing making a letter "U". Stitch and press open.
4. Add your 1 1/2" x 4 3/8 rectangle to the top exposed white and press open. You should have a nice little square that looks like the picture below.
5. It is now exclamation point time! Take one of your 1 1/2" x 3 3/8 White rectangles and piece them to one of your Gray 1 1/2" Squares. Repeat with the Blue 1 1/2" Squares. I do all mine at one time so I end up with 8 total Exclamation points (4 of each color square).
6. Match up the small blue part of your exclamation point with the blue with the long blue side so that it extends your long blue line making it longer. Place the Gray exclamation point over the short blue side so it matches up with the gray on the other side of the blue. Pin in place, stitch, and press seams open.
7. Now you are going to make and another set of exclamation points with the long 1 1/2" x 4 3/8 White rectangles and your remaining colored 1 1/2" Squares. After you piece them all together add another white 1 1/2" Square to the top of your colored square.
8. Line the Blue square of the exclamation point once again so it extends your shorter blue rectangle side. Add the gray to the opposite side so that it will match up with the long gray rectangle when pressed open. Pin, Sew, and Press. You should have a square/squares like you see below.
9. Arrange pieces as desired. And sew together. Add a border to finish off the mini or create more to make a larger quilt.
Enjoy. I hope I explained things well enough (let me know if I made a mistake - I am new at this). Also please let me know if you make one. I would love to see anything that is made from this pattern.
Friday, March 9, 2012
Will Be Back Monday
I was going to try that pattern I made up again before I posted the tutorial. I had high hopes of getting it up by today but then with being sick and then getting bit by the nesting bug...well it will be more like Monday/Tuesday. My husband was a little scared when I said I was rearranging two rooms in the house. I got the first one done yesterday evening but was too worn out to tackle the second. You think I would be able to sleep after all of that moving and then laundry...but no. My husband saw the first room and was very impressed with all the children and I had accomplished.
While I was moving stuff around I took a little snapshot of quilts I have finished last year and the start of this year (with the exception of the top quilting of the Sherbet Pips quilt). This stack is actually going to the Red Cross. It is on my nesting list to get them all over there this next week while everyone is on Spring Break from school. I am hoping to have tons more finishes this year or at least to continue making a dent in my WIP/UFO stash of quilts.
The other thing I did this past week was to sign up for the Over the Rainbow Charm Swap at Sweet Diesel Designs. I got the color assignment of Green and so picked out these two beauties:
Green is actually a little hard for me. I am really looking forward to creating a fun quilt of rainbow colors. Not sure what pattern I will use yet but I have time to figure it out before the charms all get here. I hope everyone has a wonderful weekend!
While I was moving stuff around I took a little snapshot of quilts I have finished last year and the start of this year (with the exception of the top quilting of the Sherbet Pips quilt). This stack is actually going to the Red Cross. It is on my nesting list to get them all over there this next week while everyone is on Spring Break from school. I am hoping to have tons more finishes this year or at least to continue making a dent in my WIP/UFO stash of quilts.
The other thing I did this past week was to sign up for the Over the Rainbow Charm Swap at Sweet Diesel Designs. I got the color assignment of Green and so picked out these two beauties:
Green is actually a little hard for me. I am really looking forward to creating a fun quilt of rainbow colors. Not sure what pattern I will use yet but I have time to figure it out before the charms all get here. I hope everyone has a wonderful weekend!
Monday, March 5, 2012
Sick = Productive?
I have had a cold the past week and today it got worse...I was a faucet from my eyes and nose. :( I want to sleep more than anything but with 3 kiddos at home there is no resting...especially when one of them is a toddler. So I have spent more time than usual today finishing projects. Here is the art girl quilt all finished up. I call it "It was all Yellow":
I made this from a art girl kit I purchased from a fellow Modern Quilt Guild friend (Carrie). Her kits include the girl heads, scraps of fabric, ribbons, and buttons. I drew up the little dress, arms, and shoes from my imagination and pulled a bunch of little goodies from my stash (including the sunflower buttons) to add all the yellow I needed for this one. If you are interested in her kits you can find them for sale here: http://www.etsy.com/shop/believemagic
Subscribe to:
Posts (Atom)